


OPTION 1: Cover the toilet with a trash bag, then brush freely.
When painting the entire bathroom, prep the toilet with a drop cloth before you start but save the actual painting of the tight space behind your toilet for last—it requires the most detailed attention.
Step 1: Ventilate the bathroom.
Bathrooms are often small, enclosed spaces with poor air circulation. Materials like shower curtains and towels that retain moisture also keep them consistently humid. To boost bathroom ventilation and minimize paint drying time, remove the shower curtain, floor rug, bath, and hand towels. If your bathroom has windows, make sure they are open. Run the ventilation fan or plug in a small circulating fan.
To prevent paint fumes inhalation, you may also wish you wear a painter’s mask.
Step 2: Clean and prepare the area behind the toilet.
Clean the walls, floor, wall, and toilet surfaces with a cellulose sponge dipped in a mixture of dish soap and water. This will help remove dust and dust and hair build-up. Dry the area thoroughly with terry cloths.
Next, cover the floor around the toilet with a tarp or plastic sheet secured with painter’s tape.
Then, cover the toilet with an extra-large plastic garbage bag. (Tip: You’ll find contractor clean-up bags at your local home improvement store in sizes of up to 50 gallons, and these resist accidental tearing.) Tape the bag in place around the toilet’s base. Take care to wrap any piping or trim that might be exposed with painter’s tape.


Tried-and-True Advice
“There’s no way to paint behind a toilet with it being a bit awkward. Removing the toilet is an option, but that adds a series of steps to the process that are difficult and best avoided unless you have plumbing skills. I find that removing the lid and covering the toilet with a trash bag is efficient, and it allows for full paint coverage when using narrow, spongy brushes. Look for long handle options to make the process easier.”
—Zach Lazzari, Contributing Writer
Step 3: Prime and paint the wall.
Start with one to two coats of primer to ensure the best paint adhesion. To reach behind the toilet and around pipes, you’ll want to do the following:
- Use a narrow paint roller to apply paint primer around the shape of the toilet, cutting in as best you can. Roll with the metal frame on the outside in order to get as close to the covered toilet tank as possible.
- Switch to a 3-inch-wide foam brush to paint behind the toilet. Carefully load one side of the foam brush with paint primer and, when you reach behind the toilet, keep the paint-covered side in direct contact with the wall. Apply in small strokes.
- Use a 1-inch-wide angled brush for detail work around the pipes.
Let the primer dry thoroughly before applying paint. (The paint’s drying time will depend on the temperature and humidity level in your bathroom, as well as the paint primer you choose; refer to the can for an estimated dry time between coats and before paint.)
After priming, clean your paint pan before pouring fresh paint into it. To apply your paint, follow the same tips. After the first coat, wait the amount of time recommended by the manufacturer (longer, if your bathroom is not well ventilated) so that the wall is completely dry before applying a top coat.
OPTION 2: Purchase a special painting tool to access the area behind a toilet tank.
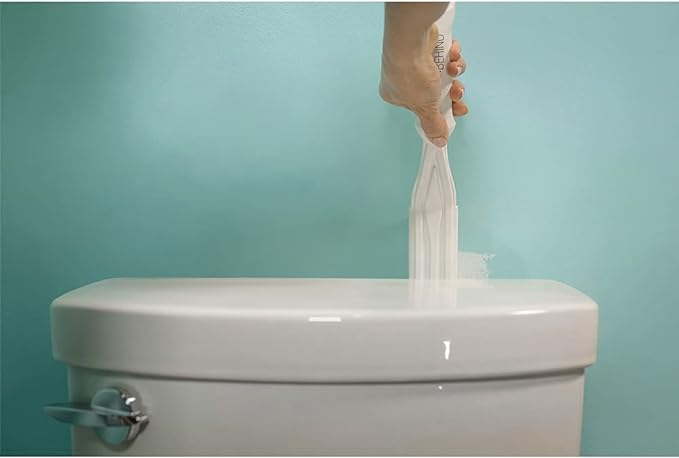
Painting the wall behind the toilet tank can be less of a pain when you use a tool designed to fit the narrow gap between the toilet tank and wall. Sure, it may be that you only have a paint job like this once every five to 10 years (maybe more, if you are a renter who appreciates a fresh coat of paint when you move in and then often needs to repaint before you move out). There’s an innovative painting tool you can buy online to access hard-to-reach areas called the Paint Behind. It’s a flat, extendable-to-12-inches paint brush that can reach behind toilets, pipes, radiators, and other tight spots.

Step 1: Ventilate the bathroom, then prep for painting.
Proceed in establishing good bathroom ventilation and a clean slate for best adhesion, just as you would in Steps 1 and 2 of Option 1.
Clean the wall behind the toilet with a cellulose sponge dipped in a mixture of dish soap and water (you might also try dipping a microfiber cloth in the cleaning solution and wrapping it around the Paint Behind, and extending the tool to clean behind the tank). While the wall air dries, clean the stick and let it dry completely before painting.
Cover the bathroom floor with a drop cloth held in place with painter’s tape, but skip bagging the toilet. Keep a damp paper towel nearby to wipe up any marks.
Step 2: Dip the tool into primer, and glide it across the wall. Repeat the process with coats of paint.
Dip the Paint Behind’s applicator pad into the paint tray to get primer on pad. Then, glide the paint wand the wall behind the toilet, pressing firmly to make sure the entire paint-saturated surface meets the wall.
Apply two coats of primer this way, leaving time between them as recommended by the paint manufacturer. Then, clean the Paint Behind with water and let it dry. Repeat the process with two coats of paint using the Paint Behind.


Save Energy While Staying Cozy