

Before You Begin
Examine the leaning fence post to figure out why it’s leaning. This will tell you what you need to do to remedy the situation. If you can’t determine the problem with your fence or think the issue may be too big to tackle on your own, contact a fencing professional.
If you share a fence with a neighbor, ensure you know who owns the fence and let your neighbor know about any fencing work you’re going to undertake whether it’s DIY or by a pro. It’s helpful to have access to both sides of the fence, but you can fix a leaning fence with access to just one side.
Tips for How to Fix a Leaning Fence
- Replace posts that are rotted, broken, or bent.
- Remove any fencing that’s in the way of straightening the post.
Safety Considerations
- Always wear protective gear like safety glasses and gloves.
- When working with heavy or unwieldy materials, consider asking another person for help to stabilize and lift the fencing.
How to Fix a Leaning Fence in 8 Steps
Step 1: Assess the problem.
Get a good look at the fence, and figure out why it’s leaning. A wooden post can become unseated and wobbly, or it can be rotted at the base. A metal fence post can be bent or unstable. If a wooden post is rotted, broken, or has insect damage, it will need to be replaced. The same goes for a bent metal post.
Step 2: Relieve pressure on the fence, and remove fence panels if needed.
To straighten the post, separate it from the rest of the fence. For chain link fence repair, remove the retaining clips and post cap. For a wooden fence, place 2-inch by 4-inch by 8-foot wooden braces on both sides of the fence and wedge them between the ground and the fence to keep the fence upright. If the horizontal rails are loose, they can be reattached to stable posts. If you only have access to your side of the fence, remove the fence pickets from both sides of the post and use the braces to create support posts on either side. Ensure you’re wearing protective gear like safety glasses and gloves.

Tried-and-True Advice
“A shop-style vacuum is ideal for cleaning out the bottom of a post hole, especially if you need to reveal the contour of a concrete footing way down in there. And, to prevent rot from recurring in your life time, use a product like Post-Protector to “sleeve” the new post. This isolates it from ground contact and therefore from rot.”
—Mark Clement, Contributing Writer
Step 3: Straighten the fence.
Once the area is dug out and there is room to maneuver the post, use a level to make sure the post is perfectly straight. To keep the post straight while you fill in the hole, affix braces to the top of the post and brace against the ground at a 45-degree angle for maximum support.
Step 4: Refill the hole with soil or concrete.
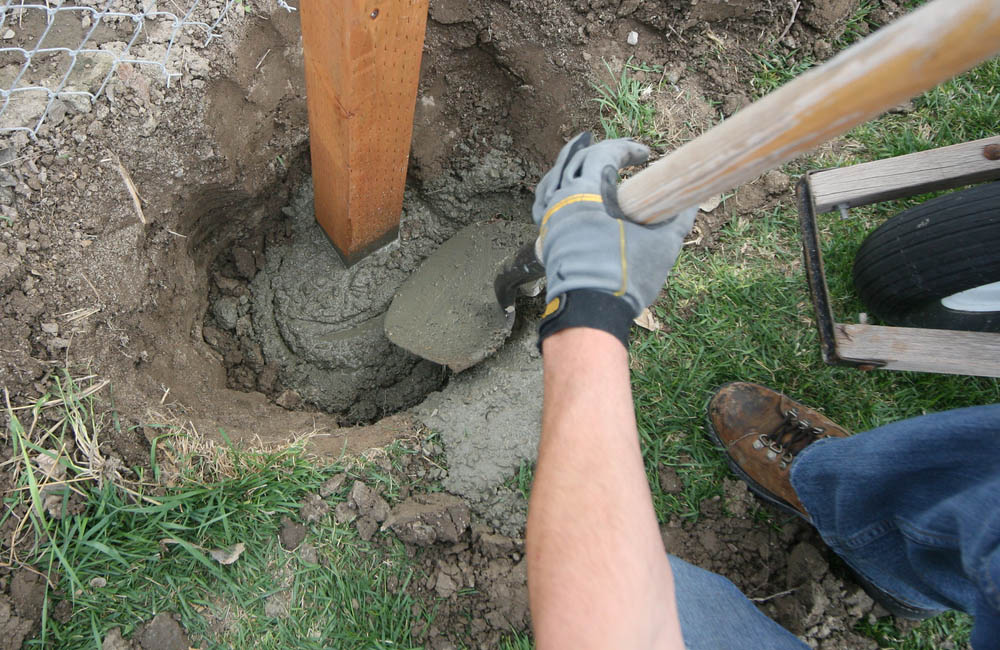
If the soil around the fence is dry and rocky, fill in the hole with half-wet sand and half small gravel. Pack the hole tightly. You can also fill the hole with fast-setting concrete and pour approximately a gallon of water on top. Make sure the water has thoroughly mixed with the concrete. It should be dry in about 40 to 60 minutes, and you can reattach the fence panel to the post in roughly 4 to 6 hours.
Step 6: Replace any old rails.

When the post is firmly upright, reattach the rails. If the post becomes loose, fill the hole with more material and make sure it’s tamped down tightly. If old rails need to be replaced, remove the old ones by pulling out the nails or the hardware that’s holding them up. Cut a new rail that fits between the posts, and nail or screw it into place.
Step 7: Reattach the posts and fence panels.
At this point, you can reattach the fence panels that you removed. Affix them to the original place, and they will be sturdy and solid.
Don’t want to do it yourself?
Fencing experts are just a click away. Get free, no-commitment estimates from pros near you.
+
Step 8: Inspect the fence regularly.
Inspection and maintenance will keep a fence standing straight and strong for years to come. Check the fence for rot, damage, or loose nails and joints. Latches and hinges should be oiled and free of rust. By keeping a well-maintained fence, you can avoid costly replacement.
When to Call a Professional
Not sure if you can tackle how to fix a leaning fence? Call in a professional carpenter or fencing expert who has the knowledge and experience to get the job done right. A professional will know exactly how to quickly fix the problem, saving you time, effort, and potentially costly errors. If you lack the materials and tools to fix a leaning fence, your best bet is to hire a fencing professional since it can take more than one person to complete the job.
By following these steps, you should be able to fix a leaning fence and maintain it. Visually inspect the fence to know what repairs need to be done, be careful, use protective equipment such as safety glasses and gloves, and, if you don’t feel confident or you lack the skills and tools to fix a leaning fence on your own, call in a professional.

Save Energy While Staying Cozy