

Before You Begin
PVC primer and cement are messy to work with and can pose a hazard to your eyes. Before getting started, break out the safety goggles (ideally with side shields) and protective gloves. It’s also a good idea to lay a tarp or towel over your work surface to minimize cleanup in the event of drips. PVC pipe cement is a chemical solvent that produces harmful toxins, so be sure to work in a well-ventilated area.
Instructions for Gluing PVC Pipe
Step 1: Measure and cut.
Start by measuring and cutting each piece of PVC pipe. A common pitfall here is forgetting to account for the 3/4 to 1 inch of pipe that goes inside the fitting, Hiller says. “The best way to size it is to make sure the pipe and fitting go together smoothly first, mark how deep the pipe goes into the fitting, then measure and cut from insertion point to insertion point,” he says.

Getting a clean, square cut is essential for getting a good seal between the pipe and fittings. Hiller recommends using a PVC pipe cutter, a tool you can get for $10 to $20, for pipes that are 1.5 inches in diameter or smaller. For larger pipes, he advises using a miter saw. “I don’t recommend a hacksaw because it leaves burrs, and it’s hard to achieve a proper sealing using it,” he says.
Step 2: Deburr the pipe.
The process of cutting through PVC usually leaves small plastic burrs that you’ll need to remove to create a clean, well fitting joint. Run the edge of a utility knife around the interior, cut edges of the pipe to remove any burrs. You can also fold a piece of coarse-grit sandpaper into a tube and gently sand the edges to clean it up. Don’t skip this step as burrs can prevent a tight seal, causing leaks.
Step 3: Dry fit the pipe and connectors.
Before gluing the pipe together, it’s crucial to first do a dry fit. Push the pipe into the fitting, checking for alignment and the proper resistance. PVC fittings taper, which means the pipe should fit snugly and you push it inside the fitting.
Once the pipes are aligned, make a line on the pipe and the fitting so you can quickly line it up when you apply glue. Since PVC pipe glue drying time is very short—the glue dries in seconds—you won’t have a lot of time to position the pipe once you’ve joined the two pieces together, so marking the pipe and fittings for quick alignment is key.
Step 4: Apply primer.
Using the brush included with the primer, paint the outside of the PVC pipe and inside of the fitting with the PVC primer. “Primer softens the plastic and helps the cement bite deeper, especially if the pipe surface isn’t perfect,” Hiller says. Allow the primer to dry for about 10 seconds before applying cement.
Step 5: Apply cement.
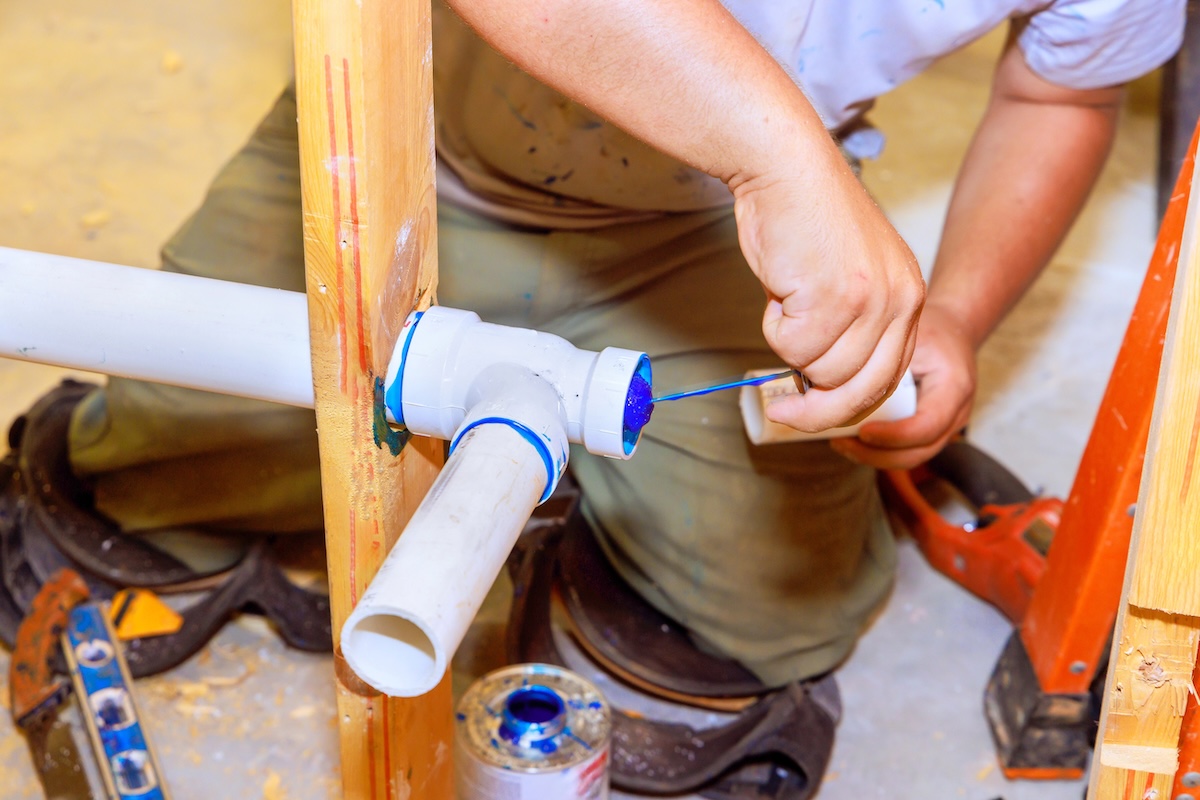
Brush cement onto the connection points on the pipe and the fitting. Make sure to coat thoroughly. “You need to prime and cement both the pipe and the fitting all the way around and all the way to the depth it slides in—don’t just smear it on one side or halfway,” Hiller says.
Step 6: Align pipe and fitting.
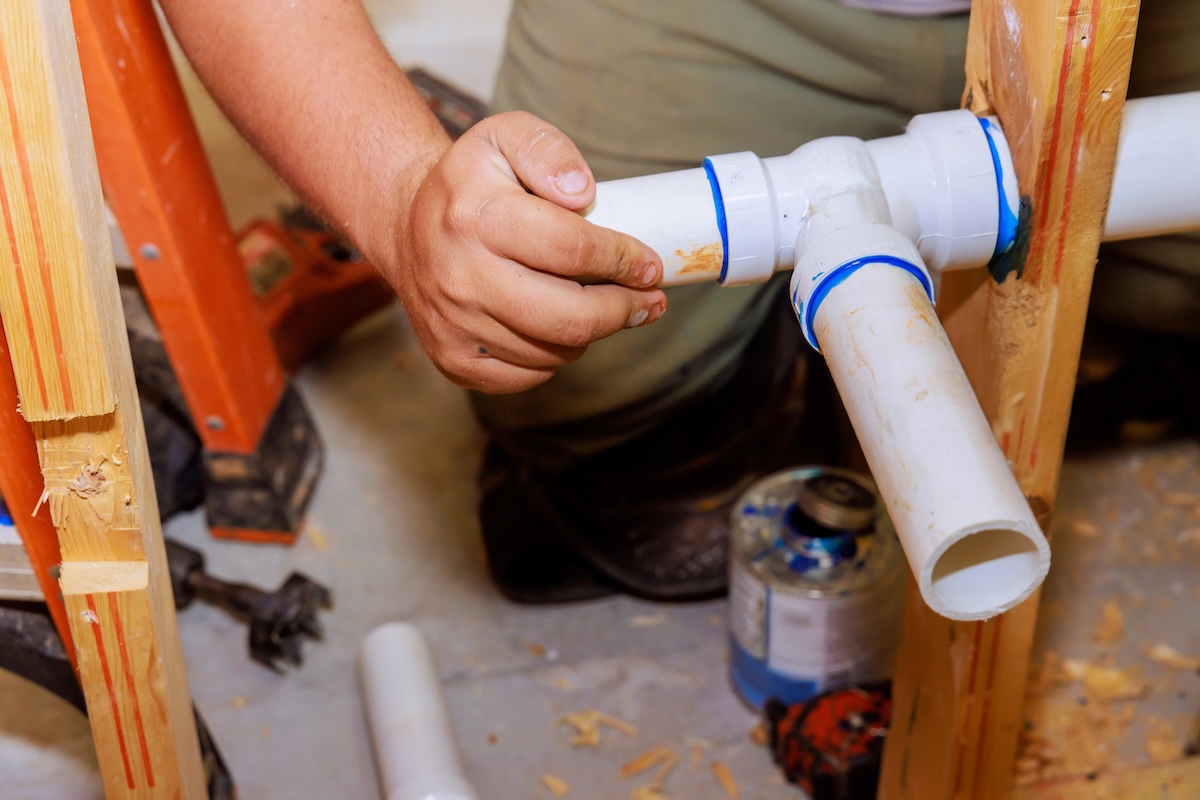
Push the pipe into the fitting so that the marks you made are one quarter turn apart. Twist the pipe a quarter turn to align the two marks. This insert and twist method helps spread the cement around the connection, ensuring there are no gaps that could lead to leaks. After twisting, hold the pipe in place to allow the glue to set. “If you don’t hold the pipe firmly in place for 20–30 seconds, it can push itself out slightly—and that tiny gap is enough to cause leaks under pressure,” Hiller says.
How to Fix Your Mistakes
Mistakes are common when fitting new PVC plumbing pipe, especially when sizing each piece of pipe. If you make a mistake and the pipe is either too long or too short, simply cut out the bad pipe and use a coupling to replace it with the correct length of pipe. Be prepared for mistakes. When purchasing supplies, buy some additional length of pipe and couplings so you don’t have to run to the store if you make a mistake.

This Is the Year for a Kitchen Renovation