

Insulating Window Exteriors
Decades of exposure to the elements can wear away one of your main defenses against heat loss: exterior caulking. Once this begins to crumble, cracks can start to form around the window frame. If your windows are drafty, take swift action to replace the exterior caulking along the window frames before the weather takes a turn for the worse.
Check the weather before you begin the process. For successful application of caulking, you’ll want clear skies for 24 hours—no snow or rain—and, ideally, temperatures above 45 degrees Fahrenheit.
Step 1: Remove old caulk and paint.
Use a strong putty knife to scrape window edges clean of the old caulking and peeling paint. Then, wipe the surface clean of any remnants with a damp rag. Let the surface dry for a few hours so the new caulking will readily adhere. It’s best to start the project early in the day to allow enough dry time. You could also leave it to dry overnight, but depending on the outside temperature, you could be in for a cold, cold night after having scraped off the old caulking.
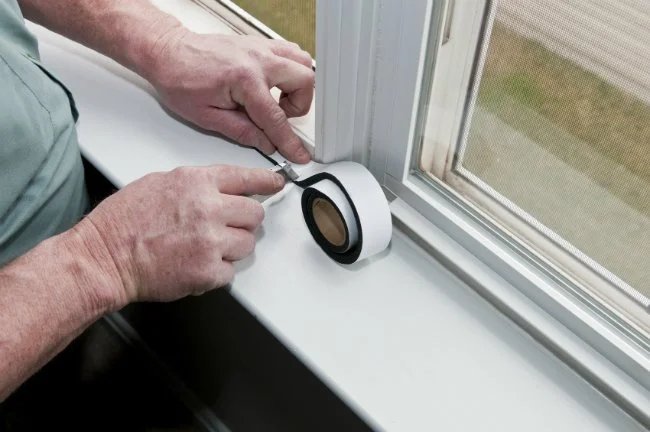
Step 2: Caulk between the frame and siding.
Load your no-drip caulking gun with a cartridge of silicone exterior caulk and hold it at a 45-degree angle in order to get deep into the cracks around the window frame. Apply a solid, continuous bead of caulking between the frame and the siding, all the way around the window. Any caulk that oozes out of the crack should be pushed in gently with a putty knife.
Step 3: Allow the caulk to dry.
Allow this to cure overnight to provide the best protection from wind and moisture.
Find trusted local pros for any home project
+
Insulating Window Interiors
The sash, the part of the window that moves to open and close, is the area most homeowners zero in on when they’re trying to improve window insulation. While this area is important, don’t neglect the glass itself or ignore other draft-curbing solutions. Take a multistep approach to insulating the inside of your windows by employing weatherstripping, window film, and energy-smart window treatments. Though we present this step-by-step approach as a process, you’ll still gain energy savings if you don’t complete every step.
Note: When you’re selecting replacement weatherstripping, closely consider the pros and cons of each material. As with many building materials, you get what you pay for in terms of lifespan. Felt, for example, is a common pick for its low price, but it can fail within only a few years. Adhesive-backed foam and tubular gasket stripping, on the other hand, are both cost-effective compression seals that work reliably and provide 3 to 5 years of protection from the cold.
Step 1: Remove old weatherstripping and clean the window sash.
If your weatherstripping is worn or crumbling, it’s time to remove and replace it. Adhesive-backed stripping can simply be pulled up by hand. If the weatherstripping is attached with nails or screws, however, you must first remove the fasteners with a claw hammer or drill before you can lift it away. Once you’ve pulled the weatherstripping off, wipe down the window sash with a damp rag or paper towels and household cleaner. Allow it to dry thoroughly.
Step 2: Apply the weatherstripping to the window sash.
Measure your sash carefully, then cut the weatherstripping of your choice to length. Start as close as you can to the end of one side of the sash, peel off any adhesive backing, then carefully press the weatherstripping into place on the sash, making your way carefully to the other end.

Tried-and-True Advice
“One insulating technique I love and have done many times requires the trim to be off (if, say, you’re installing a new window or entry door): fill the voids between the door or window jamb and the rough framing with low-expanding foam insulation.”
—Mark Clement, Contributing Writer
Step 3: Apply window insulation film.
With the new weatherstripping in place, you’ll want to double up your efforts with a window insulation kit. In addition to retaining up to 55 percent of your home’s heat in winter, this type of window covering will reflect heat and block UV rays from passing through uncovered windows, lowering indoor temperatures in summer and saving energy costs year-round. Before you proceed, check to see if your windows are still under warranty; the addition of window film may void the contract. If you’re in the clear, select the best quality insulating window film you can find for the job. Cheap versions can make the outdoors seem darker and even somewhat blurry. While that’s not a big issue for windows in some rooms, for more prominent windows, you may want to invest in higher-quality film that causes little to no loss of clarity and light.
Note: Cheaper methods that produce a similar insulating effect involve heat-and-shrink film or even bubble wrap, but these are often less attractive options that hamper or prevent the use of the windows, or hinder visibility. These inexpensive fixes, however, can be effective, easy to apply, and energy-efficient solutions for basement or attic windows.
Whichever method you choose, installation instructions vary from product to product. In general, start by washing the windowpanes so that no dust or lint gets trapped during application, then follow the manufacturer’s directions for installing the window film.
Step 4: Hang thermal curtains.
For one last defense against heat loss and drafts, consider hanging thermal curtains. For best insulating effects, install the curtain rod above and past each window on either side so the curtains fully cover the window frame. If it’s not appropriately installed, make adjustments to the rod’s position to maximize heat retention. While other window treatments like blinds or sheers offer some protection from drafts, a set of heavy curtains that you draw shut after dusk can cut heat loss by up to 17 percent.
Whether you ultimately decide to complete just one or all of these steps, you’ll still reap benefits. The more solutions you employ, however, the greater heat retention and energy savings you’ll see, and potentially not just in winter, but all year-round. If you’ve tried all these methods and still have poor window insulation, it might be time to replace your home’s windows.

Everything You Need for a Lush and Healthy Lawn